

Implementing Style Changes in Word
According to the APA style, the body of the paragraph follows directly, either on the next line or in the same line, depending on the level, after level 3, 4 and 5 headings.
However, when using MS Word’s automated Table of Contents (TOC), if a heading style is applied to the heading so that it can automatically populate in the TOC, the text that follows in the same line as the heading gets the heading style, too. This can also happen in text that follows on the next line.
The reason? Style selections are saved in the paragraph marks that follow the text.
The solution? Insert the InsertStyleSeparator after the heading, then proceed with a different style in the text that follows, whether on the next line or in the same line.
See the directions below for how to do this.
What Style Separator Tags Can Do for You
Style separator tags allow you to do the following:
- Apply heading styles to a single word or phrase in a paragraph so that only that word or phrase appears in the TOC.
- Include two styles in a single paragraph so that the lead-in paragraph appears in the TOC.
- Apply outline levels to lead-in text so that only the lead-in text appears in the TOC.
- Apply outline levels to a single word or phrase in a paragraph so that only that word or phrase appears in the TOC.
|
It does this by inserting a hidden paragraph mark that serves as a delineator between texts of different styles. |
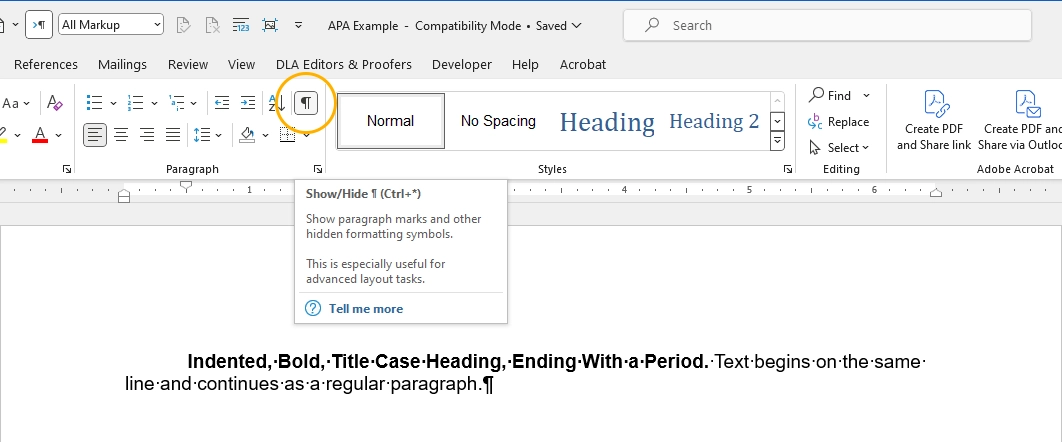
Step 1: Make the Style Separator Mark Visible
To make the style separator mark visible, follow these steps:
- On the Home tab, find the Paragraph group.
- In the top right-hand corner, click on the backward P to show paragraph marks and other hidden formatting symbols.
|
Are you looking to meet the requirements for a degree, grant or publication? If so, you’ll want to ensure your writing is as professional and polished as possible. That’s where DLA Editors & Proofers comes in. DLA Editors & Proofers is a team of expert editors that helps students and professional academics achieve acceptance of their work for a degree, grant or publication. With their expertise across many fields, DLA Editors & Proofers makes improving your paper or dissertation easy until it’s ready for submission. So if you are looking to meet the requirements for a degree, grant or publication, take your time—use DLA Editors & Proofers to give your writing the edge it needs to meet even the strictest requirements. Try DLA Editors & Proofers today, and take the first step toward meeting the requirements for your degree, grant or publication. |
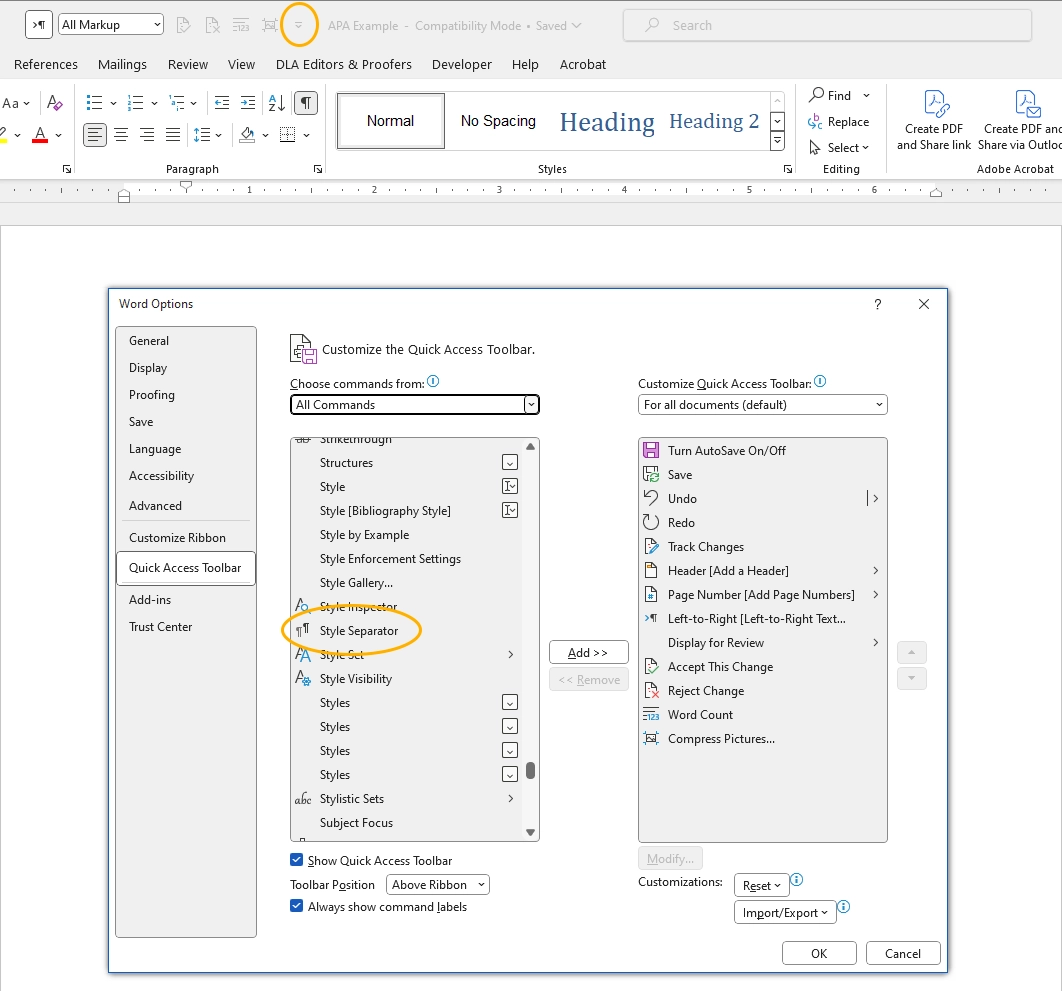
Step 2: Add the Style Separator Button to Your Toolbar
Before you can use the Style Separator feature, you must add the Style Separator button to either your ribbon or Quick Access Toolbar:
- Click Customize on the Tools menu.
- Click the the down arrow at the right end of your Quick Access Toolbar tab, then click More Commands in the pop-up list.
- In the menu on the left-hand side of the pop-up window, choose either Customize Ribbon or Quick Access Toolbar (used in this example), then, under Choose Commands From, change the selection from Popular Commands to All Commands.
- Locate and select StyleSeparator in the Commands list, and then click Add to add it to the list of commands on the right. Click OK.
Step 3: Add a Style Separator to Your Text
To add a Style Separator to your text:
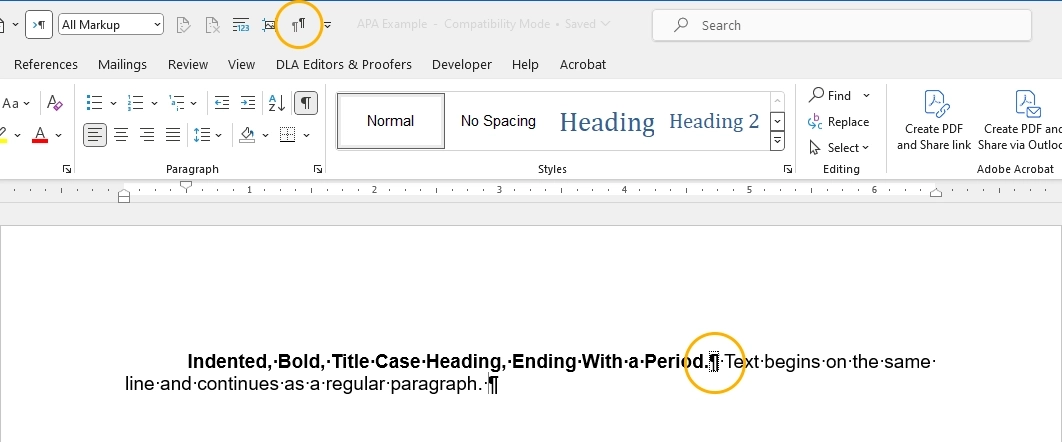
- Place your cursor in the text where you want to add the Style Separator and click the Style Separator button you have added to your Ribbon or Quick Access Toolbar.
- By default, MS Word may insert the Style Separator before the paragraph mark at the end of the text.
- If the Style Separator is not where you want it, highlight it, cut it (e.g., with Ctrl + x) and paste it where you want it.

|